I switched my main shell to fish shell. What convinced me are the auto-suggestions and auto-completion. The customization options and the features out of the box are also excellent. Blablabla… I guess you found this page in a Google search because something with the setup didn’t work, and you don’t care why I like fish. So let’s get into it…
MacOS
1 Install brew (if you haven't already)
See brew.sh for instructions.
2 Install fish via brew
In Terminal, run:
brew install fish
3 Add fish to available shells
Brew should have installed fish to /opt/homebrew/bin/fish.
Verify that the file exists.
Then add /opt/homebrew/bin/fish to /etc/shells using your favorite text editor.
For example:
sudo nano /etc/shells
# add `/opt/homebrew/bin/fish` in a new line.
4 Change main shell
…using the change-shell (chsh) command:
chsh -s /opt/homebrew/bin/fish
That’s it for MacOS! When you open a new Terminal window, fish will start by default.
Android Studio / IntelliJ
In the menu bar, click on “Android Studio” or “IntelliJ”, then on “Settings…” (or use the shortcut ⌘+, instead).
In the tree view, select “Tools ▸ Terminal”:
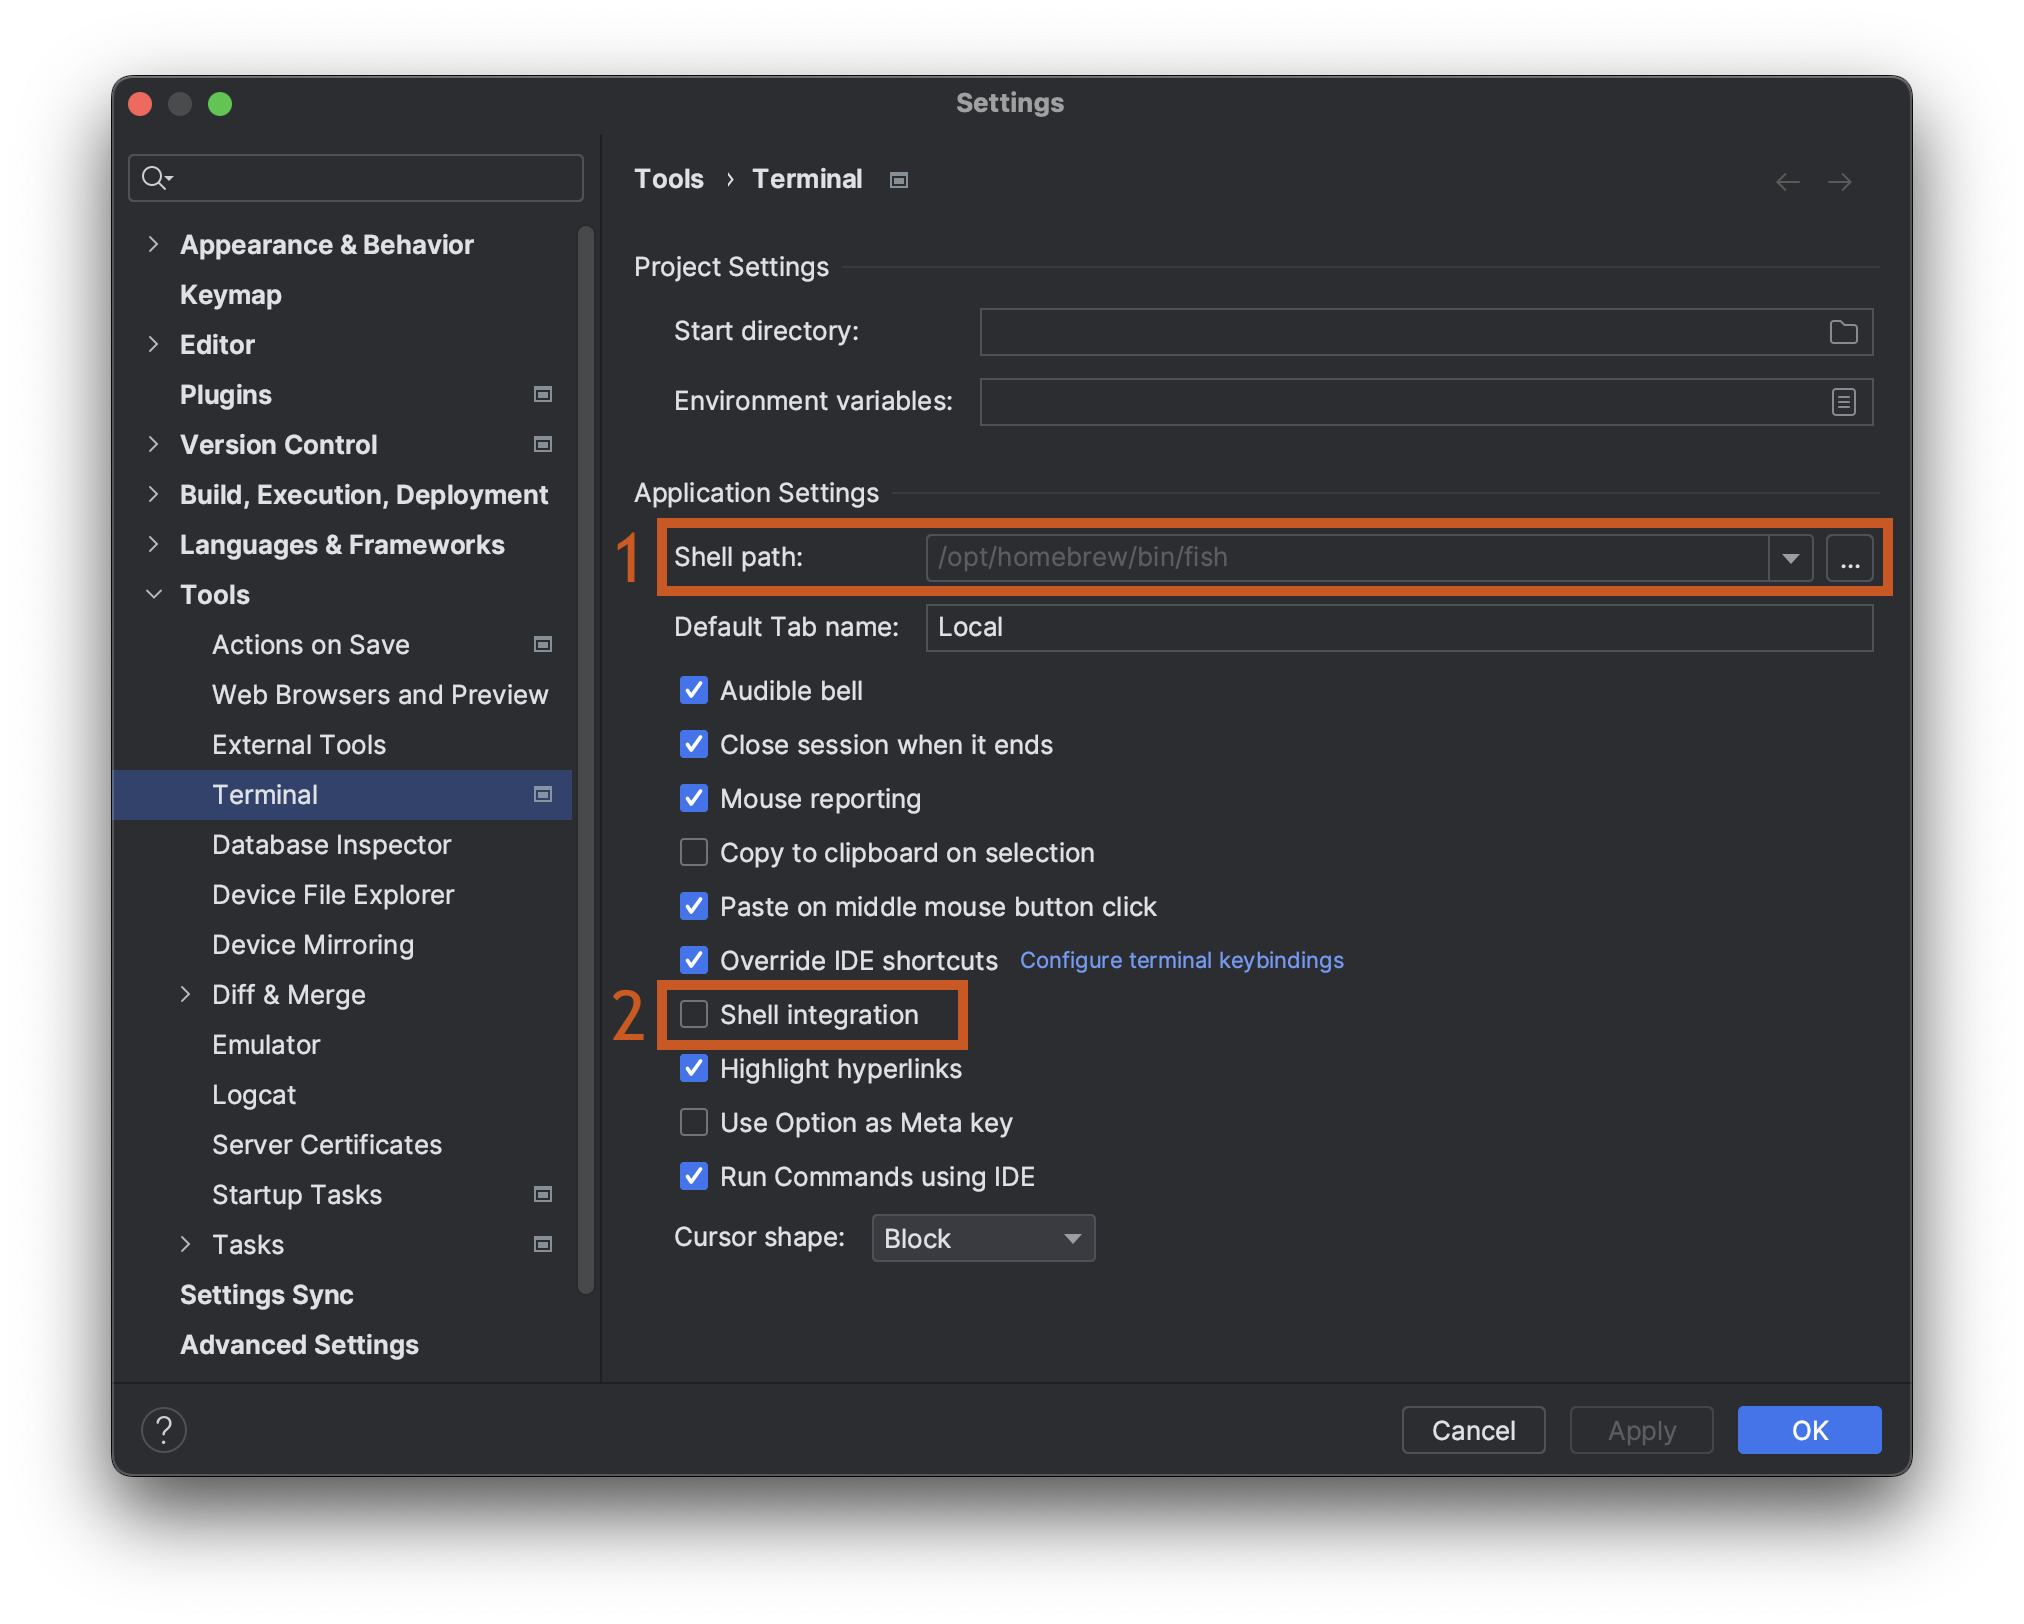
- For the Shell path select
/opt/homebrew/bin/fish. - Make sure to uncheck “Shell integration”.
With “Shell integration” enabled, I had problems with fish not finding global environment variables that I configured and also programs that were added to PATH couldn’t run. Unchecking “Shell integration” resolved both problems.
That’s it! Also your Android Studio or IntelliJ Terminal now starts with fish by default. Have fun!